


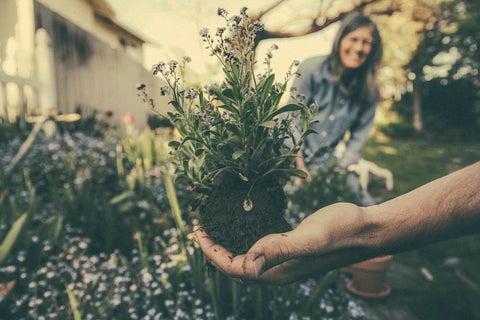
For home gardeners, there are two things that are (or should be) always in the back of their mind as they deal with lawn clippings and raked leaves. Those are composting and mulching. After all, leaves and lawn clippings provide two of the best free sources for both. But what is the difference between compost and mulch and how can you make your own for free?
Simply put, compost is made up of organic materials that have been completely decomposed. When compost is ready to use, it has a rich black color and is crumbly in texture with a sweet earthen smell. Mulch is organic material that is used on the surface of your garden to reduce weed growth, provide insulation, holding in warmth and moisture, and reducing soil erosion.
Each has their own use, and any good gardener will make use of both before, during, and after the growing season. It doesn’t matter if you have a hundred tomato plants or you use grow bags on your balcony. The great thing about mulch and compost is also that it’s simple to make your own out of lawn clippings, raked leaves, and even most organic kitchen scraps.
May Is For Mulch
A saying among gardeners is that May is for Mulch. That’s because May is the month when things start to warm up. A good layer of mulch over your garden will help to keep the soil warm overnight and more importantly, it will help the soil retain important moisture. Additionally, your seeds should be well past the sprouting stage, so you can lay down a layer of mu As well, mulch will eventually break down and as it does, it releases important nutrients into the soil.
For perennial gardens, such as those used mainly for decoration around your home, commercial cedar chips are often your best choice. Not only do they last for several years due to a slow rate of decomposition, the cedar oils help repel insects from your bushes and flowers. Cedar comes dyed in several colors, so you can find something that you find pleasing to the eye.
For vegetable gardens, using leaves that have been shredded is a fantastic way to save money and provide an organic weed deterrent. You can also use grass clippings or even straw. Lay down a layer that is about an inch thick after your seedlings have grown a bit. Water through the mulch as your soil needs it.
Composting For Beginners
Compost is best used at the beginning and the end of the growing season. It shouldn’t be laid over the top of the soil, but rather, blended in before you plant or incorporated after the harvest to let the soil rest. You can also use compost in a localized fashion by adding compost to the planting hole of a new plant. You do have to be careful when using it in this method. Don’t add too much compost or you’ll stunt your new plant’s growth. That’s because the roots won’t feel the need to branch out to look for moisture and nutrients as the compost provides a nice warm cocoon for them.
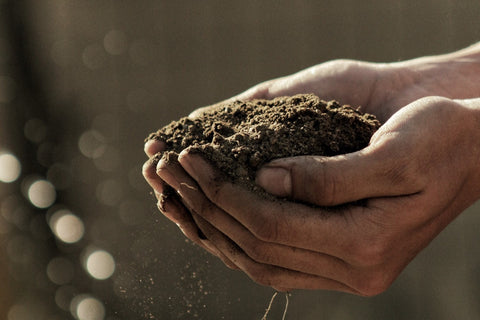
Making compost properly without a special container takes about a year. The process is simple; all you need is a plastic non-reactive container with a lid. Drill holes that are about 1/2-inch wide on all sides. Put about five of them per side arranged like the five spots on a six-sided die. This allows for adequate drainage. Next get a pair of hooked bungee cords that are long enough to wrap all the way around the container and hold the lid tight. That’s your composting container. You can keep it in the backyard or on your porch. Don’t worry about insects or a bad smell; you shouldn’t get either because of the composting process.
Making the actual compost takes building it up as you get fresh organic waste and mixing it in proper ratios with dead organics. The usual terms for the two types of waste are green and brown, and the ratio for them is 1 part green to 2 parts brown. The brown materials provide carbon and are a good source of energy for the composting process. Green materials provide nitrogen, which helps to speed up the process of decomposition
There are numerous items that you can use as a source of brown materials. One of the best sources is leaves that have fallen in the autumn. These brown and crinkly leaves are an excellent material and are usually free for the taking in the fall. Other sources that you have ready at hand are paper and cardboard. These materials should be shredded finely before being added. When using paper, avoid ad pages with lots of colors and glossy inserts. Other brown materials are eggshells, wood ashes (from a fireplace or fire pit), and tea bags. You can also use sawdust from wood that hasn’t been pressure treated. If you do use sawdust, use it sparingly in thin layers.
Green materials that you can use will primarily come from your kitchen. Vegetable peels, scraps of fruits, and coffee grounds are all great green compost ingredients. You can use grass clippings, but those are usually best reserved to use as mulch. If you do use grass, use it very sparingly, as the grass tends to clump and prevent adequate air circulation.
Remember to never add pet or human waste to your compost. Likewise, don’t add any mature weeds with seeds, meats, or fats. Pressure treated wood should also never be added to compost. Likewise, don’t add plywood dust, particle board or used cat litter.
When you start a new bin of compost, start with a thick layer of leaves at the bottom of the bin. These will allow air circulation through the compost. You can then start adding green materials and brown materials in an approximate ratio of 1 part green to 2 parts brown. The first time you start, add a few handfuls of old compost to help start the reaction. As you add materials, moisten the compost until it has the consistency of a very dry sponge. If the compost gets too wet, add brown materials to dry it slightly. As you add materials, turn your bin, to keep the air circulating and the compost well mixed.
Keep adding materials until the bin is full. Once it is filled, keep it moist and keep turning the bin every few days to help keep air circulating. After about a year, your compost will be ready to use. You may find that you produce enough green scraps to fill several bins through the year. If so, you can keep compost in a rotation and you’ll always have it when you need it.
Both compost and mulch are two key ways for gardeners to improve their soil quality and their plant quality as time goes by. Both are simple to use, easy to make, and have incredibly potent impacts on your garden.